If you're running the same load twice because it came out damp the first time, something's wrong with the heating side of the dryer. Not the motor, not the drum. Usually a blocked vent, a dead thermal fuse, or a heating element on its way out.
In this guide from National Appliance Repairs, we’ll walk you through the actual causes, what you can check without a technician, and when it's not a DIY job anymore.
Why Your Dryer Runs But Doesn't Heat
Plenty of dryers keep tumbling perfectly normally while producing no heat at all, because the drum motor and the heating system don't depend on each other. So the fault isn't always obvious just from listening to it run.
A Blocked Vent or Lint Build-Up
This is by far the most common cause, and the easiest to rule out yourself. Lint that escapes the filter gradually coats the exhaust duct, the drum seals, and the areas around the motor. Once airflow drops enough, drying times stretch out even before the heating element or thermal fuse actually fails. A blocked vent is also a genuine fire hazard: Queensland's Electrical Safety Office notes that lint build-up around the drum and vent openings can elevate drum temperature enough to ignite, and recommends cleaning the filter every use.
A Blown Thermal Fuse
It's a one-time safety device -- trips once and stays tripped. Its job is cutting power to the heating element (or, on gas dryers, the burner circuit) if things run hotter than they should. Almost always the real cause is a blocked vent choking off airflow, not the fuse itself being faulty. That's the trap: swap the fuse without clearing the vent and the new one blows again within a few loads.
A Failed Heating Element or Igniter
Electric dryers heat with a coiled element, and years of running hot because of a half-blocked vent will eventually burn one out. Gas dryers don't have an element at all -- they've got an igniter and a gas valve instead. Watch for the igniter not glowing, or the valve just not opening. Drum spins fine either way. No burner firing means no heat, full stop.
A Faulty Thermostat or Sensor
This one's harder to spot. The thermostat and moisture sensor decide when heat cycles on and off, and when one's faulty the results are inconsistent -- sometimes under-heating, sometimes overheating, sometimes cutting the heat cycle short. All three look identical from the laundry room: clothes that never quite finish drying.
Quick Reference: Symptoms and Likely Causes
Symptom
Most Likely Cause
Can You Check This Yourself?
Clothes damp after a full cycle, drum spins normally
Blocked vent or dirty lint filter
Yes, clean filter and check outside vent flap
No heat at all, drum still tumbles
Blown thermal fuse or failed heating element
Limited, requires multimeter testing
Gas dryer tumbles but never warms up
Faulty igniter or gas valve
No, requires a licensed technician
Drying time gradually getting longer over weeks
Vent restriction building up
Yes, worth checking before it fails completely
Burning smell during the cycle
Overheating from severe blockage
Stop using immediately, call a technician
What You Can Check Before Booking a Repair
A few checks take five minutes and rule out the simplest causes.
Clean the lint filter and check it isn't torn or clogged with a waxy build-up from dryer sheets
Check the external vent flap opens freely when the dryer is running
Make sure the exhaust duct isn't crushed, kinked, or disconnected behind the machine
Confirm you're not overloading the drum, since a packed load restricts airflow too
Note whether the number of cycles needed to dry a normal load has crept up recently
If clothes are still damp after these checks, or if you notice a burning smell or the dryer feels hot to the touch, stop using it and arrange a professional inspection.
Why This Isn't a DIY Repair Job
Checking the lint filter and vent is safe and sensible. Going further, such as testing or replacing a heating element, thermal fuse, or gas igniter, is not. Dryers combine high-voltage electrical components with parts that reach several hundred degrees during normal operation, and gas models add pressurised gas lines into the mix. Getting it wrong risks electric shock, burns, or a fire.
National Appliance Repairs technicians are trained across vented, condenser, and heat pump dryers, and carry genuine heating elements, thermal fuses, and vent components in every van, so most heating faults are diagnosed and fixed in a single visit. Every dryer repair comes with a 12-month warranty on parts and a 3-month warranty on labour, and same-day appointments are often available across Melbourne, Sydney, Brisbane, Adelaide, and Perth, subject to availability.
Frequently Asked Questions
Why does my dryer run but not produce heat?
Two separate systems. The motor spins the drum, the element (or burner) makes the heat, and one can die without touching the other. Blocked vent or blown thermal fuse is the usual culprit. After that, a burnt-out element on electric models or a dead igniter on gas ones.
Is a dryer that won't heat actually dangerous?
Can be. If the no-heat problem is coming from a blocked vent, that's not just an efficiency issue -- it's a recognised fire risk. Burning smell, hot casing, anything like that: stop running it and get it looked at instead of pushing through another cycle.
Can I fix this myself?
Some of it. Lint filter, external vent flap -- go ahead. Heating element, thermal fuse, thermostat, gas igniter -- no. Those involve either high voltage or a gas line, and that's a technician's job.
What does it cost to fix?
Depends entirely on what's actually broken. A thermal fuse is a cheap part. A heating element or gas valve is a bigger job. Ring 1300 434 380 and you'll get a ballpark over the phone before anyone books anything.
How often should the vent actually get cleaned?
Filter, every load -- that one's non-negotiable. The full exhaust duct wants a proper clear-out at least once a year, sooner if you notice loads taking longer than they used to.
The Bottom Line
A dryer that won't heat is rarely worth ignoring or working around with extra cycles. Most cases trace back to a blocked vent, a blown fuse, or a worn heating component, and all three are straightforward for a qualified technician to diagnose and fix. If your dryer is taking two or three cycles to finish a normal load, get in touch with National Appliance Repairs or call 1300 434 380 to book a same-day assessment, subject to availability, before a minor fault turns into a bigger one.
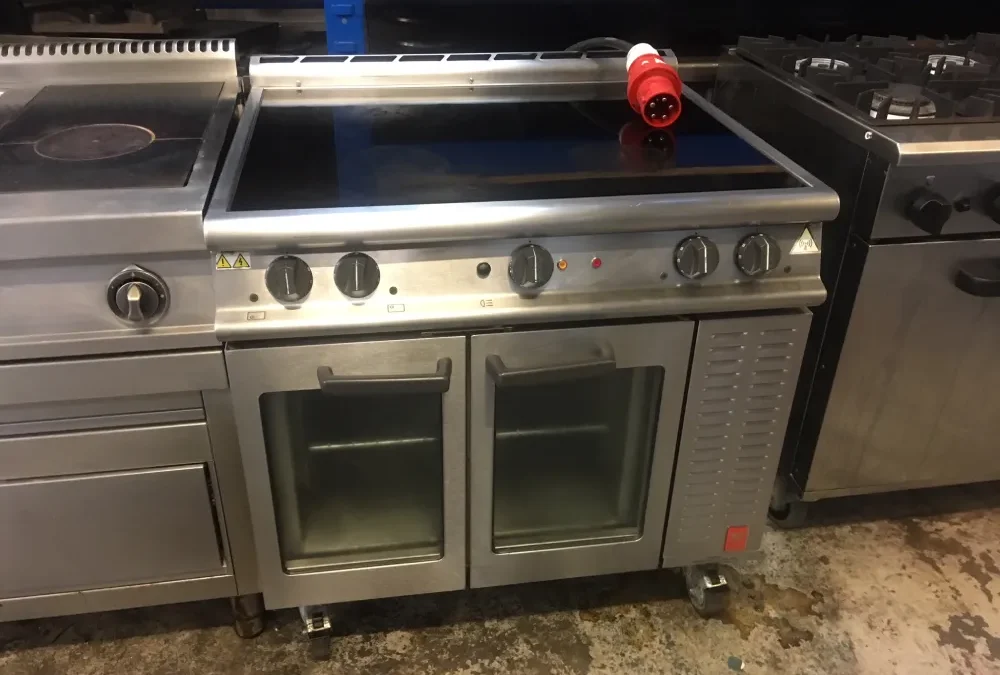
Zone's lit up, power level's showing, everything looks normal, and… the pan sitting on it is stone cold. At National Appliance Repairs, we get these kinds of calls all the time. It can understandably be quite confusing at first because induction doesn't work like gas or standard electric.
Before assuming the cooktop's broken, it's worth understanding what it's actually checking for, because most "not heating" cases turn out to be the appliance doing exactly what it's designed to do.
How Induction Heating Actually Works
No heat comes from the surface itself. An electromagnetic field forms underneath the glass, and it only transfers energy into cookware with a magnetic base. Pan's not magnetic, wrong size for the zone, or not sitting flush against the surface -- no heat, by design, not by fault. Get the cookware right and most of these "faults" disappear on their own.
The Most Common Causes
Incompatible cookware. Aluminium, copper, glass, and plenty of stainless steel just aren't magnetic enough. Quick test: hold a fridge magnet to the base of the pan. Sticks firmly, it'll work. Slides off or barely clings, it won't, no matter what's wrong or right with the cooktop.
Pan too small for the zone. Every zone's got a minimum detection size. Fully magnetic pan, still too small, still won't register. Catches people out most with a small saucepan or milk pot sitting on a standard zone.
Pan off-centre or not sitting flat. Compatible cookware still won't get detected if it's not centred over the zone markings, or if a warped base leaves a gap underneath. Worth checking on a flat surface if you suspect this.
Moisture or debris on the surface. Water, oil, food residue between the cooktop glass and the pan base can throw the sensor off. Wipe both dry before placing anything down.
Control lock or an active timer. Plenty of models include a child lock or timer that stops heat output without making it obvious from the display. Worth a look in the manual for how your model shows this.
Overheat protection kicking in. Long session, or a cooktop mounted above another heat source like an oven, and a safety shutdown can trigger. Power off, lift the pan, give it 10 to 15 minutes. Usually clears on its own.
Buying Cookware That Actually Works
If you're regularly running into detection issues, it might be worth checking your whole cookware set rather than one problem pan. Stainless steel is the trickiest category, since some stainless cookware is fully magnetic and some isn't, depending on the specific alloy used in the base. Cast iron, enamelled cast iron, and any pan explicitly labelled induction-compatible will almost always work without issue. Aluminium, copper, and most glass or ceramic cookware won't work at all unless it has a magnetic base plate bonded on, which some manufacturers do add specifically to make otherwise incompatible cookware induction-ready.
The magnet test takes ten seconds and saves a lot of guesswork before you buy anything new: if a magnet sticks firmly to the base in the shop, it'll work on your cooktop at home.
Caring for the Glass Surface
The glass surface is more durable than it looks, but it isn't indestructible, and how you treat it affects both cooking performance and how long it lasts. Sliding heavy cast iron across the surface rather than lifting it can scratch or, in rare cases, crack the glass. Sugar-based spills left to burn onto the surface can etch it if not cleaned up while still warm. A cooktop-specific glass cleaner and a dedicated scraper handle both of these far better than an all-purpose kitchen cleaner or an abrasive scourer, which can dull the surface over time and make it harder to keep clean.
Quick Reference: Fault vs Fix
Symptom
Likely Cause
Quick Check
Zone lit, pan stays cold
Non-magnetic cookware
Fridge magnet test on pan base
Zone flashes and shuts off
Pan too small for zone
Check minimum zone diameter in manual
Detection fails intermittently
Pan off-centre or warped base
Recentre pan, test on flat surface
No response at all from any zone
Power supply or breaker issue
Check outlet and dedicated circuit
Works, then shuts down after time
Overheat protection
Power off, let cool for 10-15 minutes
Display shows an error code
Model-specific fault
Check manual for that code's meaning
What to Check Before Booking a Repair
Run the fridge magnet test on the base of the pan you're using
Confirm the pan fully covers the cooking zone markings, not just touches the edge
Wipe the cooktop surface and pan base dry before placing cookware
Check for an active control lock or timer setting on the display
If the whole cooktop is unresponsive, check the circuit breaker, since induction cooktops draw significant current and require a dedicated circuit
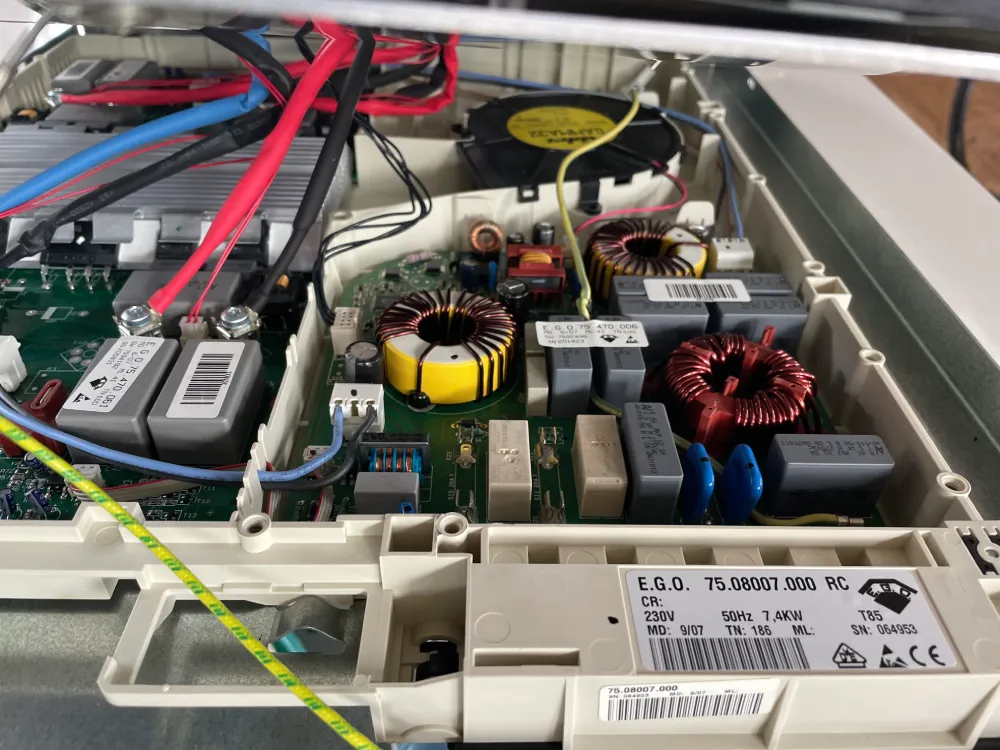
When It's Actually a Fault, Not Cookware
Confirmed compatible, correctly sized, properly placed cookware, and the zone still won't detect it or make heat. Now it's the appliance. Usually a failed coil, a faulty sensor, or a control board problem, and none of those get fixed safely without proper diagnostic gear and genuine parts.
National Appliance Repairs technicians work across induction, ceramic, and electric cooktops, and carry coils, control boards, and sensors for major brands in every van. Most induction cooktop repairs wrap up same-day when parts are in stock, backed by a 12-month parts warranty and 3-month labour warranty. Weighing up induction against a gas cooktop for your next appliance? Our technicians can talk through it during a service call too.
What a Technician Actually Tests
A proper diagnosis starts with ruling out cookware, since it's the fastest and most common explanation. From there, a technician checks power delivery to the cooktop, tests each zone individually to see whether the fault is isolated to one coil or affects the whole unit, and inspects the control board for visible signs of damage or component failure. An isolated single-zone fault usually means a localised coil or sensor issue, quicker and cheaper to fix. Every zone failing together points toward the control board or the main power connection, a bigger job but still a single, contained repair rather than a reason to replace the whole appliance.
Frequently Asked Questions
Why does my induction cooktop show power but the pan won't heat?
Almost always cookware, not a fault. The base needs to be magnetic, the right size for the zone, and sitting flat and centred for the cooktop to detect it at all.
How do I know if my cookware will actually work on induction?
Fridge magnet, held to the base of the pan. Sticks firmly, it's compatible. Doesn't stick, or barely clings, that pan's not going to heat regardless of what condition the cooktop's in.
Why does it shut off after a while?
Overheat protection, most likely, especially after a long session or if it's installed above another heat source like an oven. Power off, lift the pan, let it cool before you go again.
Nothing at all gets detected on any zone. Serious?
If the cookware's confirmed compatible, right-sized, and dry, and still nothing registers anywhere, that's pointing at a genuine electrical fault, a failed coil or control board. Needs a professional look.
What does it cost to fix an induction cooktop?
Depends on the fault. A sensor or touch control issue costs less than a coil or control board replacement. Call 1300 434 380 for a ballpark before booking.
The Bottom Line
Most induction cooktops reported as "not heating" are working exactly as designed, just paired with the wrong pan. Run through cookware, positioning, and lock settings first and you'll solve most of these in a few minutes. Still won't heat with confirmed compatible cookware? Contact National Appliance Repairs or call 1300 434 380 for a same-day assessment, subject to availability, across Melbourne, Sydney, Brisbane, Adelaide, and Perth.
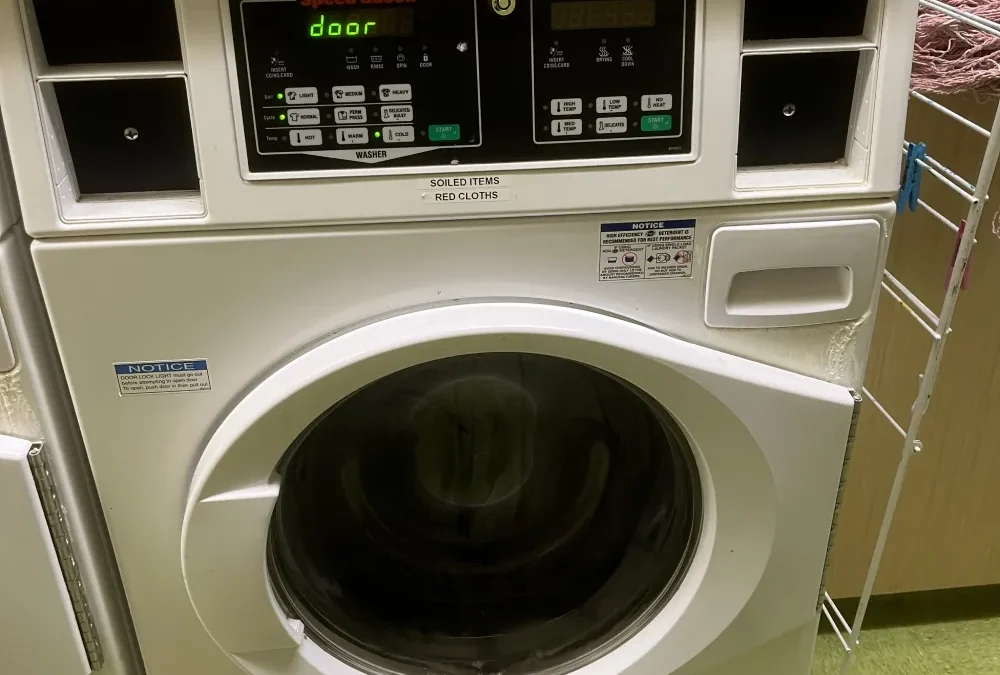
Completely dead, no lights at all -- that, in our experience at National Appliance Repairs, is an entirely different problem to “powered up but refusing to start a cycle”. Takes about two minutes to work out which one you've got, and that alone rules out most of the simple causes before you're on the phone to anyone.
First, Work Out Which Problem You Have
Nothing at all -- no lights, no display, no response to any button -- points at the power supply. Something else entirely.
Lights on, display working, but pressing start does nothing (or it just beeps), and that's not a power problem. That's the door, a lock setting, or an internal switch getting in the way.
If There's No Power at All
Check it's actually plugged in properly. Sounds obvious, but a cord works loose during a spin cycle more often than you'd think, especially with an off-balance load shaking things around.
Check the circuit breaker for the laundry circuit. A surge, or another appliance sharing the circuit, can trip it.
Plug something else into the same outlet, a lamp or a phone charger, and see if it's actually live.
Got a GFCI-protected outlet? Common in newer installs. Check for a tripped reset button, since nearby moisture can trip these on its own.
If It Has Power But Won't Start
Check for an active control lock or child lock. The display can be fully lit and the machine still won't start with this on.
Make sure the door's fully closed and latched. Not just pushed shut, actually latched.
See if delay start's been switched on by accident.
If there's an error code showing, check what it means in the manual before assuming the worst.
Quick Reference Table
What You See
Likely Cause
Next Step
No lights, no display at all
Power supply issue: outlet, cord, or breaker
Check outlet with another device, check breaker
Lights on, but start button does nothing
Control lock or delay start active
Check settings, hold unlock if applicable
Display on, door open indicator showing
Door not fully latched
Close door firmly, check for obstruction
Machine hums but doesn't start
Motor or capacitor issue
Book a repair, don't keep attempting cycles
Repeated tripping of the breaker
Internal electrical fault
Stop use, book a technician
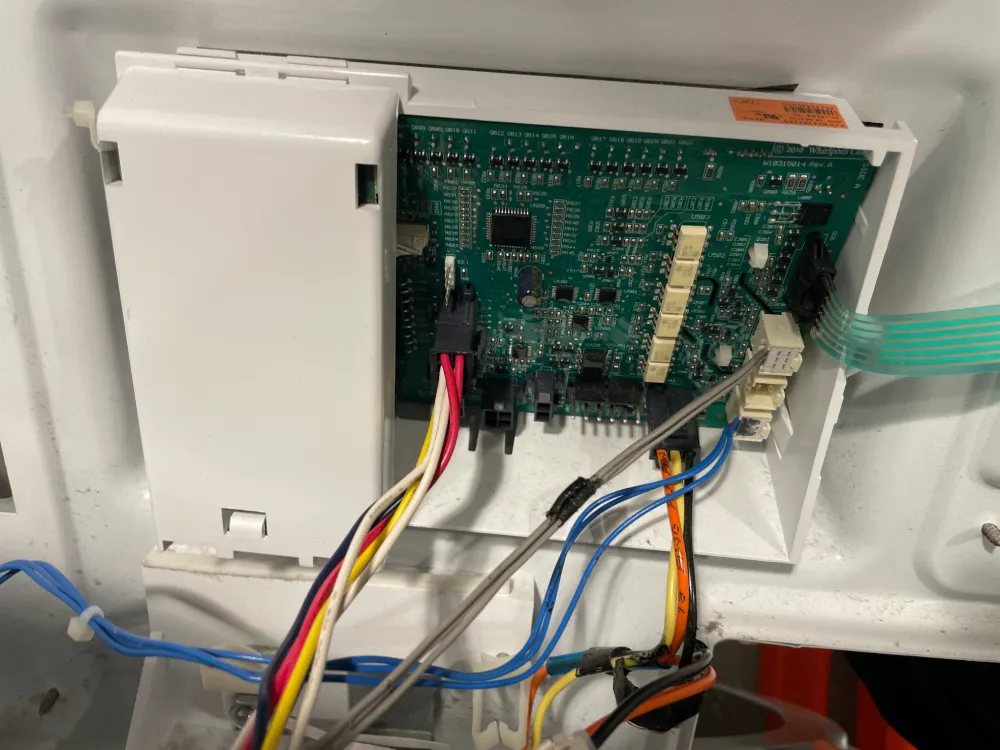
When the Fault Is Inside the Machine
Outlet's fine, breaker's fine, door's latched, no lock setting active, and it still won't turn on. At that point you're looking at one of a handful of internal parts:
A faulty door or lid switch. Plenty of machines use this as a safety interlock and won't send power to the motor without it
A failing control board or user interface board
Wiring between the control board and front panel gone loose or corroded
On older, non-digital machines, a worn main control timer
None of this is something to open up and test yourself. A machine that's still partially live carries real shock risk, and guessing wrong means paying for a part you didn't need.
Front-Loaders vs Top-Loaders: The Switch Works Differently
Front-loading machines rely on a door lock mechanism that often can't be released mid-cycle, both as a safety measure and to stop water spilling out mid-wash. If that lock mechanism fails in the closed position, the machine can read the door as open even though it's shut, and refuse to start. Top-loaders use a simpler lid switch, usually a small plastic tab that gets depressed when the lid closes. These wear out or snap after years of lids being slammed shut, and it's a cheap part once correctly identified, but the machine won't tell you that directly. It just won't start, with no more explanation than a front-loader gives.
Either way, the fix isn't obvious from the outside, which is exactly why a proper diagnosis matters more than guessing and replacing parts one at a time.
Why This Is Worth a Professional Diagnosis Rather Than Guesswork
Swapping a control board before confirming it's actually the fault is an expensive way to be wrong. National Appliance Repairs technicians find the actual point of failure first, whether that's a switch, a board, or wiring, and carry the common parts for washing machine repairs across all major brands, so most jobs wrap up in one visit. Machine turns on fine but leaks or won't drain instead? Worth a look at our guides on water pooling under a washing machine and washing machines that won't drain.
A Few Habits That Reduce Repeat Failures
Avoid slamming the door or lid shut. It seems minor, but repeated force is exactly what wears out latch mechanisms and lid switches early
Don't overload the outlet or circuit the washing machine's plugged into with other high-draw appliances
If your laundry has a GFCI outlet, test it occasionally using the built-in test button, since a faulty GFCI can trip intermittently for no obvious reason
Keep the control panel and buttons clean and dry. Moisture and detergent residue on buttons can cause them to stick or register presses incorrectly over time
If a control lock or child lock feature isn't something you use, check it's genuinely switched off rather than assuming it is
Is It Worth Repairing, or Time to Replace?
A control board failure on a machine that's two or three years old is almost always worth repairing. A door switch or lid switch is a low-cost part regardless of the machine's age. Where it gets more of a judgement call is an older machine, say ten years or more, that's had a couple of unrelated faults already. At that point a technician can give you an honest read on whether another repair makes sense or whether the machine's simply reaching the end of its practical life, rather than just replacing whatever's failed this time and leaving you to deal with the next fault a few months later.
Frequently Asked Questions
Why does my washing machine have no lights or display at all?
Points at the power supply, not the machine. Loose cord, tripped breaker, or a dead outlet. Test the outlet with a lamp or anything else you've got handy, and you'll know within a minute which one it is.
It's got power, but the start button does nothing. Why?
Check for an active control lock or delay start first, then make sure the door's genuinely latched, not just pushed to. A lot of machines won't start a cycle without the door sensor registering a full close.
It's humming but not running. Safe to keep trying?
No. Humming with no drum movement usually means a motor or capacitor problem, and forcing repeated starts tends to make it worse, not better. Turn it off, book a technician.
Can I test or swap the control board myself?
Wouldn't recommend it. Mains voltage's involved, and fitting a new board when the actual fault's a switch or a loose wire wastes money without solving anything.
What does it cost to repair a washer that won't turn on?
Depends on the cause. A switch or wiring fix costs a lot less than a full control board. Call 1300 434 380 for a ballpark before booking anything in.
The Bottom Line
Outlet, breaker, door latch, lock settings -- work through those first and you'll solve a surprising number of "dead" washing machines without a repair at all. Still nothing after that? Get in touch with National Appliance Repairs or call 1300 434 380 for a same-day assessment, subject to availability, across Melbourne, Sydney, Brisbane, Adelaide, and Perth.
A puddle under the washer rarely stays a small puddle. Leave it a week and you're looking at damage to flooring, cabinetry, maybe the ceiling below if you're upstairs. The good part: where the water shows up, and when in the cycle -- in National Appliance Repairs’ technicians -- tells you most of what you need to know before you touch anything.
Where the Water Is Coming From Matters
Location first. Timing second. Together they narrow it down fast.
Water at the front. Door seal, usually -- the door gasket or boot seal on front-loaders. Rubber, accordion-shaped, lines the door opening. Tears from a stray object in a pocket, or just degrades over time from mould and detergent build-up. A little water sitting in the folds after a wash is normal on most front-loaders. Water actually leaking out the bottom of the door is not.
Water at the back. Check the inlet hoses first, hot and cold, then the drain hose connection. Loose fitting, cracked hose, drain hose slipped out of the standpipe -- all common, all cheap to fix.
Water pooling dead centre, underneath. Drain pump territory. Sometimes the pump hose, occasionally the outer tub itself. A cracked pump housing or a hose clamp that's worked loose over years of vibration both show up this way.
Timing narrows it further. Leaks only during fill: inlet valve or hose connection. During wash or agitation: door seal, or a tub-to-pump hose. During drain or spin: the pump, its hoses, or the drain connection itself.
Front-Loaders and Top-Loaders Leak Differently
Front-loading machines are the ones most people picture when they think of a leaking washer, mainly because the door seal is such an obvious and visible part. But top-loaders leak too, just from different places. Without a door gasket to worry about, top-loaders more often leak from the water inlet valve, a cracked tub, or the transmission seal underneath the agitator. A top-loader pooling water is less likely to be a seal problem and more likely to be a hose, valve, or an internal seal that's failed after years of use.
High-efficiency machines, whether front or top-loading, add another variable: they use less water per cycle by design, which means detergent residue and lint have less water to rinse away with. That residue builds up in hoses and around seals faster than it would in an older, higher-water-use machine, and it's part of why HE machines benefit from an occasional empty hot cycle with a washer cleaner run through them.
Quick Reference Table
Leak Location
Timing
Likely Cause
Front of machine
Any point in cycle
Torn or degraded door seal
Back of machine
Fill stage
Inlet hose or valve connection
Back of machine
Drain or spin
Loose or blocked drain hose
Centre, underneath
Drain or spin
Drain pump or pump hose
Anywhere, excessive suds visible
Wash stage
Too much detergent (oversudsing)
What You Can Check Before Calling a Technician
Ring the base of the machine with dry paper towels, run a cycle, then check which ones are wet first
Look over the door seal for tears, trapped debris, or a stray sock caught in the folds
Confirm the drain hose is properly seated in the standpipe and hasn't kinked
Check the inlet hose fittings, both at the wall and at the back of the machine, for drips
Cut back on detergent if you're seeing heavy suds, especially non-HE detergent in a front-loader
Why Some Leaks Need a Professional
A door seal swap is a fairly contained job. A drain pump or tub seal is different territory. Getting into either usually means partially taking the machine apart, and doing that wrong risks water reaching the electrics under the drum. Worth stopping use once you've confirmed it's a genuine internal leak rather than a loose hose, particularly if you're in an apartment and there's a unit below you.
National Appliance Repairs carries drain pumps, seals, and hoses for all major brands in every van, so most washing machine repairs get sorted in one visit. Ruled out the seal and hoses already and it's still coming back? Our guide to washing machines that won't drain covers a fault worth checking at the same time. Every repair carries a 12-month parts warranty and 3-month labour warranty.
Why It's Worth Acting Quickly
A leak that looks minor on day one rarely stays that way. Water finding its way under vinyl or timber flooring can cause swelling and warping within days, and if the laundry sits above a living space, ceiling staining and structural damage follow if it's left running. Renters and apartment owners have an extra reason to move fast: water damage that reaches a neighbouring unit or common property can turn a simple repair into an insurance claim. None of that requires panic, just not putting off the diagnosis for a few more loads because the machine's still technically working.
Keeping It From Coming Back
Check hose fittings for drips every few months rather than waiting for a puddle to notice
Replace rubber inlet hoses with braided stainless steel ones if yours are more than five years old. Rubber perishes; braided hoses last considerably longer
Wipe down and inspect the door seal regularly, and leave the door open between washes so it dries out and doesn't develop mould that accelerates wear
Stick to the recommended detergent amount for your machine type, and switch to HE detergent if you've got a front-loader or HE top-loader
Run an empty hot cycle with a washer cleaner every month or two to clear residue building up in hoses and around seals
Frequently Asked Questions
Is a bit of water in the door seal normal?
Yes, a small amount sitting in the folds after a wash is normal on most front-loaders. It's there to keep the rubber from drying out. Water actually leaking out from under the door onto the floor is a different story and worth checking.
What's the first thing to check if I find water under the machine?
Where it shows up and when. Front, back, or centre, and which stage of the cycle. That combination rules out most of the possibilities before you've called anyone.
Can too much detergent cause a leak?
Yes. Overdo it, especially non-HE detergent in an HE or front-loading machine, and you get oversudsing that pushes water out around the door or drum. Cutting back the amount often fixes it with no repair needed at all.
Should I keep using the machine if it's leaking?
Stop until you know the source. A loose hose is generally fine to leave running a cycle or two. An internal leak from the pump or tub seal gets worse with continued use, not better.
What does it cost to fix a washing machine leak?
Depends on what's actually leaking. A hose reconnection or a seal clean costs very little. A pump or tub seal replacement is a bigger job. Call 1300 434 380 for a ballpark before booking anything.
The Bottom Line
Water under the washer almost always comes down to the door seal, the hoses, or the drain pump, and where and when it shows up tells you which one. Nothing obvious turn up in your own check? Get in touch with National Appliance Repairs or call 1300 434 380 for a same-day assessment, subject to availability, across Melbourne, Sydney, Brisbane, Adelaide, and Perth.
Igniter's clicking away, no flame shows up. No gas smell either, just a burner refusing to light. Usually not serious. But gas is one of those areas where it's worth knowing exactly where the line sits between something you sort out yourself and something a licensed technician needs to touch.
In this guide from the in-house experts at National Appliance Repairs, you’ll find the real causes, what's fine to check, and the safety steps that actually matter once gas is involved.
The Most Common Causes of a Burner That Won't Ignite
Moisture or food debris in the burner. The most common cause by a distance, especially right after cleaning. Water or grease sitting in the burner ports or around the igniter stops the spark reaching the gas, even while it's clicking away normally. Give it time to dry out and it usually sorts itself.
A misaligned burner cap. There's a small notch on most caps that has to line up with the igniter electrode. Put it back a few degrees off after cleaning and the spark either misses the gas altogether or has to jump further than it's built for. Either way, ignition gets weak or dies completely.
A faulty igniter or spark module. The igniter itself is a small ceramic part generating the spark. Crack it, wear it out, or let the spark module behind it fail, and you'll typically see one burner sparking weak and inconsistent while the rest light normally. This is a parts job, not a cleaning job.
Clogged burner ports. Grease and food debris build up in the small holes ringing the burner over years of use. Enough of it and the flame goes uneven, weak, or stops catching altogether.
Something upstream in the gas supply. Every burner clicking, nothing lighting, no gas smell anywhere. Check the isolation valve behind the cooktop is fully open. Partially open is enough to choke ignition without cutting gas off completely, and it's easy to overlook.
LPG bottle running low. If you're on bottled gas rather than mains, a nearly empty cylinder can produce weak, intermittent ignition before it fails completely. Worth checking the gauge or swapping the bottle before assuming there's a fault in the cooktop itself.
Two Types of Ignition, One Common Confusion
Older gas cooktops use a piezo igniter, a small mechanical device that generates a spark when you press it, no electricity required. Most cooktops made in the last couple of decades use electronic spark ignition instead, wired into the mains, triggered by turning the control knob to the ignite position. It's a small distinction but it matters for troubleshooting: if your cooktop uses electronic ignition and there's been a power outage or a tripped breaker, every burner will click weakly or not at all, even though there's nothing wrong with the gas supply or the burners themselves. Check the power situation before assuming a bigger fault.
Signs You Need Gas Cooktop or Stove Repair
Igniter clicking but burner won't light after cleaning and drying
Flame is orange, yellow, or uneven rather than blue
One burner consistently weaker than the others
Gas smell when the appliance is switched off
Burner ignites slowly or takes many clicks to catch
Control knobs feel loose or don't click through the ignite position properly
What's Safe to Check Yourself
Give the cooktop time to dry out if it's been recently cleaned or something spilled on it
Check the burner cap sits flat and the notch lines up with the igniter
Once the appliance is cool and switched off, clear visible debris from the burner ports with a soft brush
Make sure the appliance is plugged in and the breaker's on. Electronic ignition still draws mains power even on a gas cooktop
When to Stop and Call a Professional Instead
Situation
What To Do
Burner clicks but won't light, no gas smell
Fine to work through the checks above yourself
Flame lights but runs orange or uneven
Book a repair. Usually a combustion or burner port issue
Gas smell while the appliance is switched off
Turn off the gas supply if it's safe to, ventilate, call a licensed gas fitter or your distributor's emergency line straight away
Igniter won't stop sparking
Cut power to the appliance and book a repair
Basic checks done, still nothing
Call a technician rather than going further yourself
Why Gas Safety Isn't a DIY Area
Pressurised gas line, electrical ignition, open flame -- three things that don't forgive mistakes. Energy Safe Victoria's advice on a gas smell is blunt: turn off appliances if it's safe to, then call your distributor's emergency number straight away. Gas leaks aren't a wait-and-see problem. Same goes for replacing a valve, regulator, or igniter module yourself. Even a burner head put back together slightly wrong changes how evenly and safely the thing burns.
National Appliance Repairs technicians working on gas cooktops and gas stoves are trained in gas safety as a baseline requirement, not an extra. Genuine igniters, valves, and thermostats travel in every van, so most ignition faults get sorted in one visit, backed by a 12-month parts and 3-month labour warranty.
What Actually Happens During a Repair Visit
A technician starts by isolating the appliance and checking gas supply pressure before touching anything else. Then it's a burner-by-burner check: cap alignment, port condition, igniter spark strength, and whether the fault is isolated to one burner or affects all of them. That last point matters, because a single weak burner usually means a worn igniter or clogged ports, while every burner failing together points toward the gas supply, the isolation valve, or the appliance's main electrical connection.
If a part needs replacing, genuine igniters, spark modules, and gas valves for major brands are carried in the van, so most repairs are completed on the spot rather than requiring a second visit. Anything involving the gas line itself gets pressure-tested before the job's signed off, and you'll get a plain explanation of what failed and why, not just a part number on an invoice.
Preventing This From Happening Again
A handful of habits keep burners lighting reliably and cut down on repeat callouts.
Dry the cooktop fully after cleaning before using it again, rather than lighting a burner while it's still damp
Reseat burner caps carefully after cleaning, matching the notch to the igniter every time
Clean burner ports with a soft brush every few weeks if you cook often, rather than waiting until ignition becomes unreliable
Keep the isolation valve fully open during normal use and only close it when you actually need to
If you're on bottled gas, keep a spare cylinder or know the supplier's turnaround time so a low bottle doesn't catch you out mid-cook
Frequently Asked Questions
Why is my gas cooktop clicking but not lighting?
Moisture or food debris around the burner or igniter, most likely, especially soon after a clean. If the cooktop's clean and bone dry and it's still not lighting, look at a misaligned cap or a worn igniter next.
Is it safe to keep using a burner that won't light?
Generally yes, if there's no gas smell and it's just the one burner. Smell gas at any point, or get continuous clicking with nothing happening, and that's the point to switch off and stop trying.
What do I do if I smell gas near the cooktop?
Gas off at the meter if it's safe to reach it. Windows open. No naked flames, no flicking switches nearby. Call a licensed gas fitter or your distributor's emergency line straight away.
Can I replace a gas igniter or valve myself?
No. Pressurised gas lines need a licensed gas fitter, full stop. A valve or igniter fitted slightly wrong can mean a leak or uneven combustion, and neither is something you want to discover after the fact.
What does it cost to fix a cooktop that won't spark?
Depends what's actually wrong. Igniter swap or a burner clean costs a lot less than a gas valve or regulator job. Ring 1300 434 380 and get a ballpark before anything's booked.
The Bottom Line
Most of the time this is moisture, a cap sitting slightly off, or an igniter on its way out. None of it's dramatic. The one thing that changes everything is a gas smell -- that's not a troubleshoot-it-yourself situation, that's a stop-and-call-someone situation. Basic checks not cutting it? Contact National Appliance Repairs or call 1300 434 380 for a same-day assessment, subject to availability, across Melbourne, Sydney, Brisbane, Adelaide, and Perth.